Testnet Web Wallet Setup
Lastly, you will need to set up your Testnet Web Wallet to access its advanced features, such as Namespace creation.
Step 1:
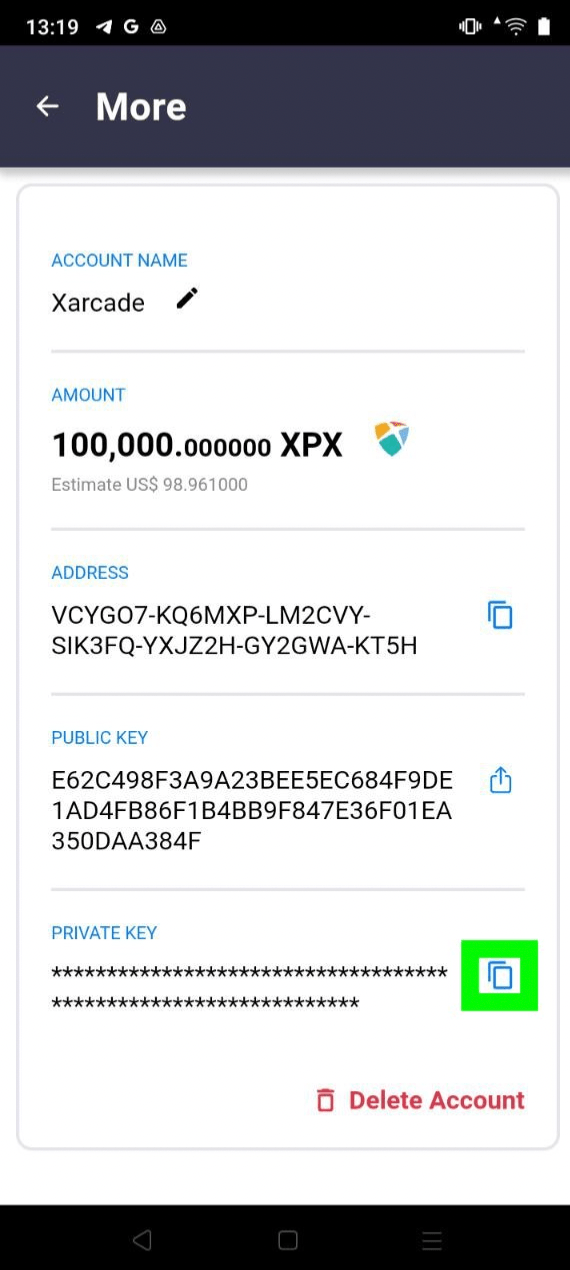
- Select More on the home screen.
- To keep your Private Key secure, you cannot view it on your screen.
- Select the copy icon to copy your private key.

Step 2:
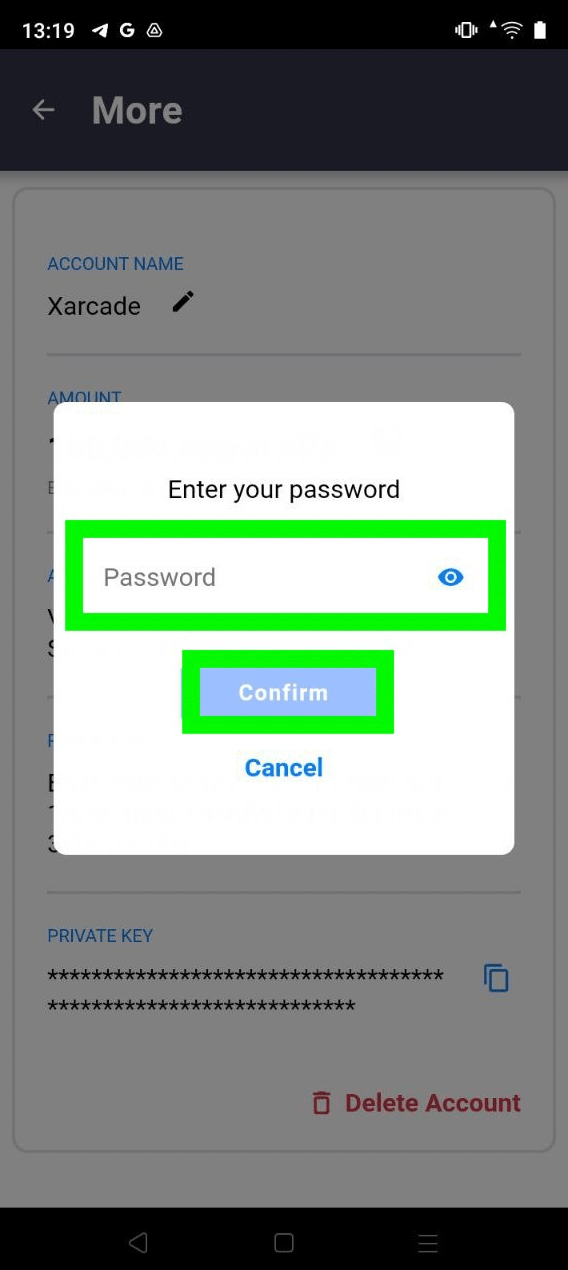
- Enter your password to copy your private key and select Confirm.
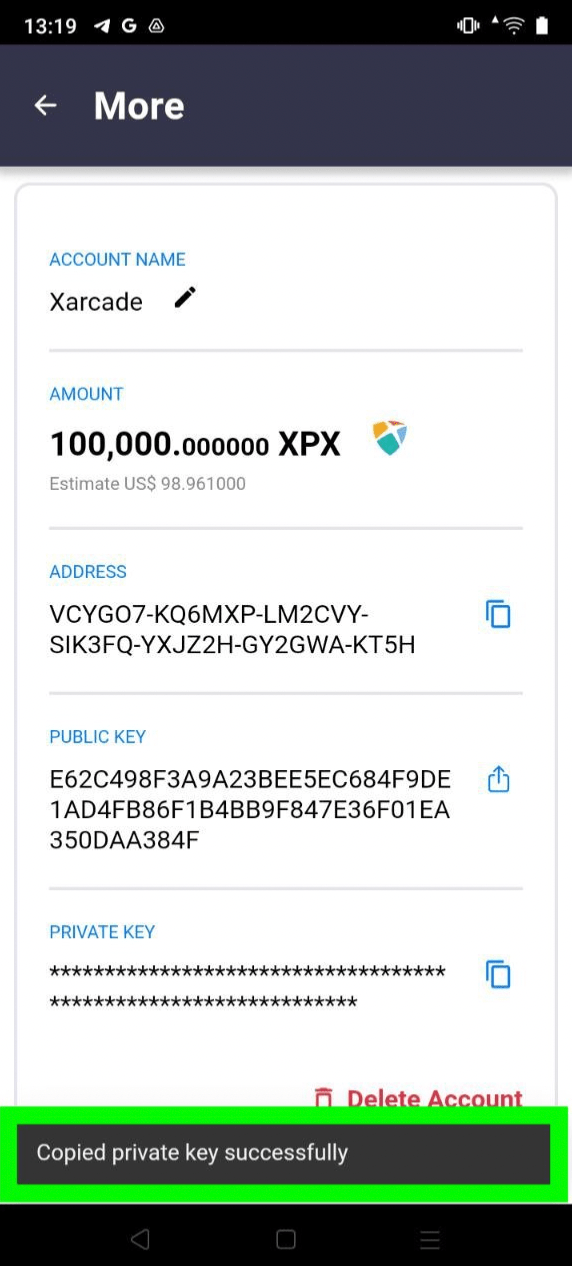
- The wallet will then notify you that your private key is successfully copied.
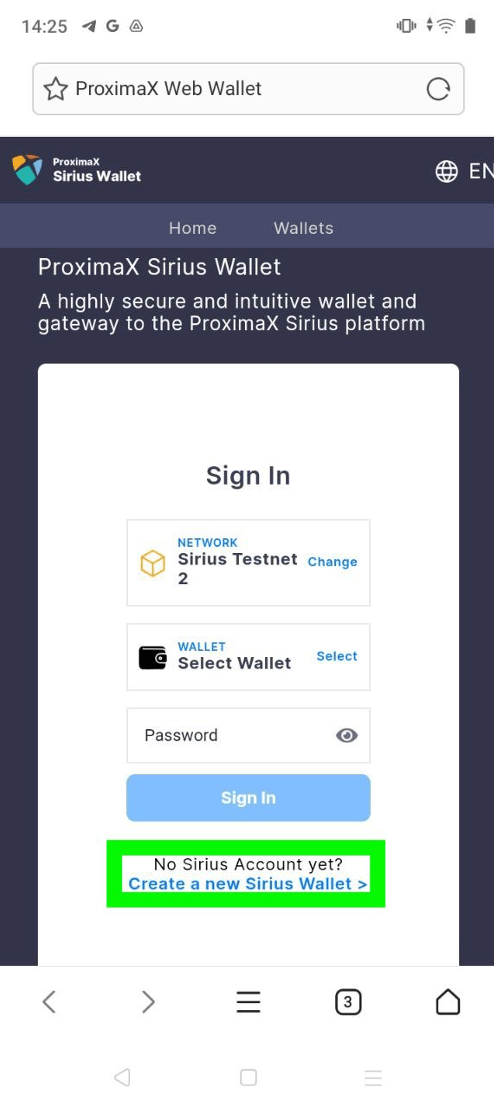
Step 3:
- CLICK HERE to access the Testnet Web Wallet on your mobile phone.
- On the Sign In page, select Create a New Sirius Wallet.
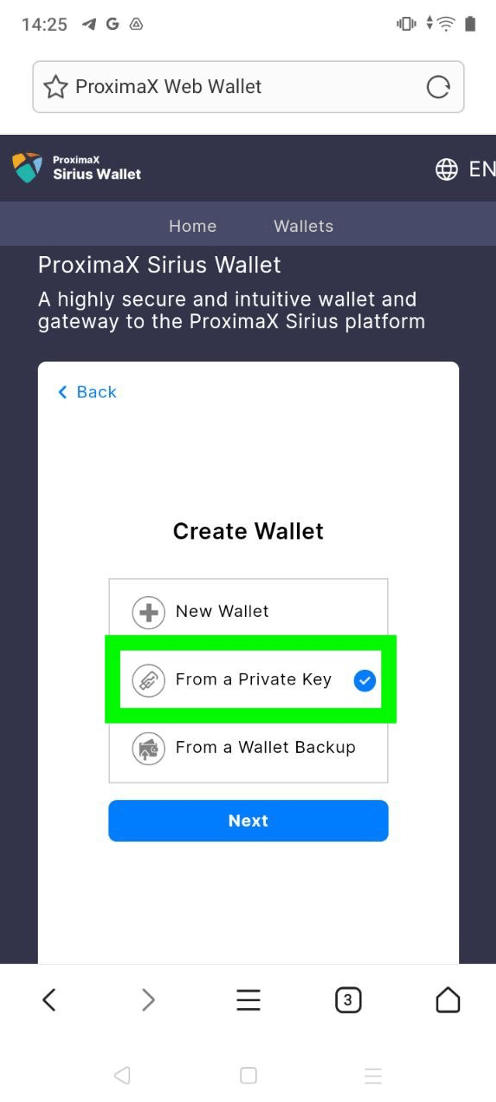
- On the Create Wallet page, select From a Private Key.
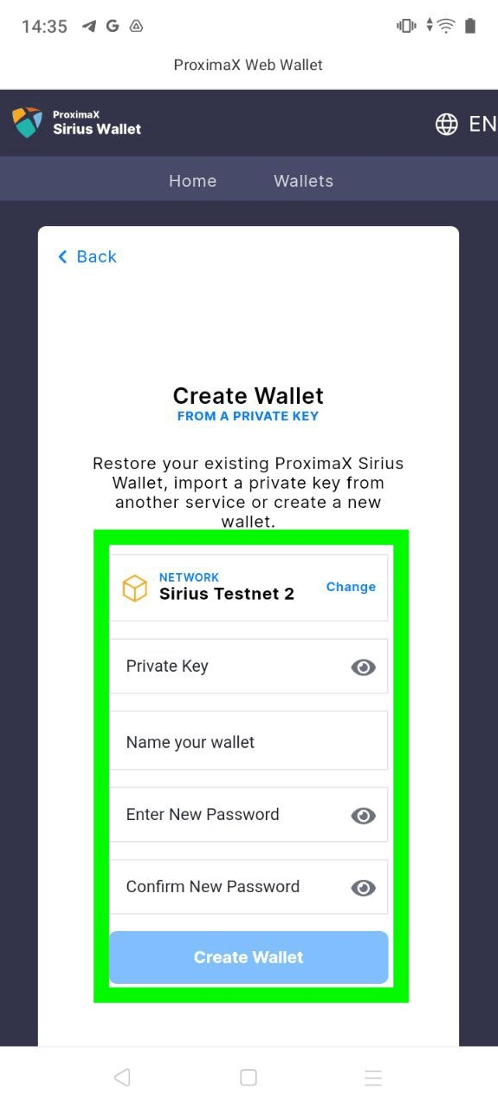
Step 4:
- Paste in your private key.
- Enter a new wallet name for your reference.
- Enter a password.
- Confirm your password.
- Select Create Wallet.
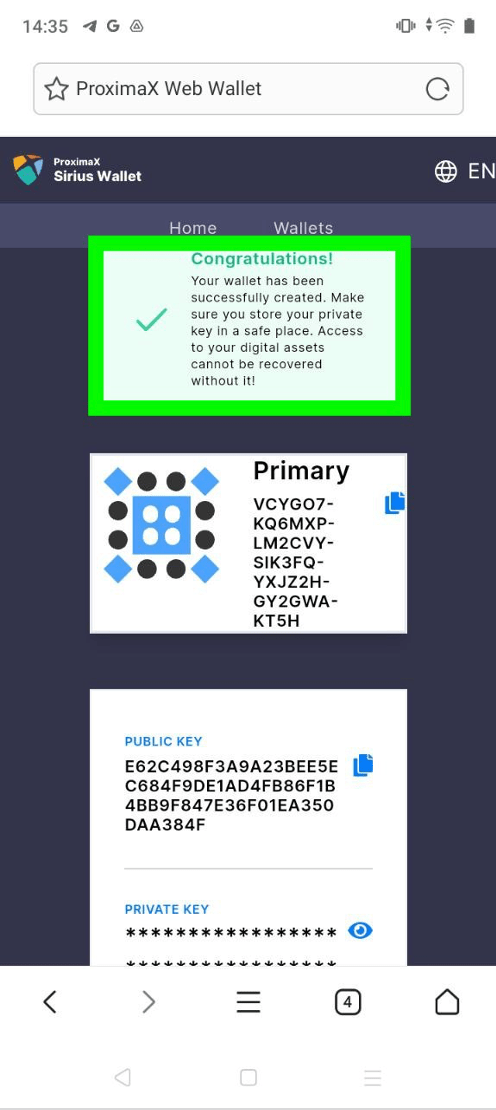
- Congratulations, you have now imported your account into the web wallet.
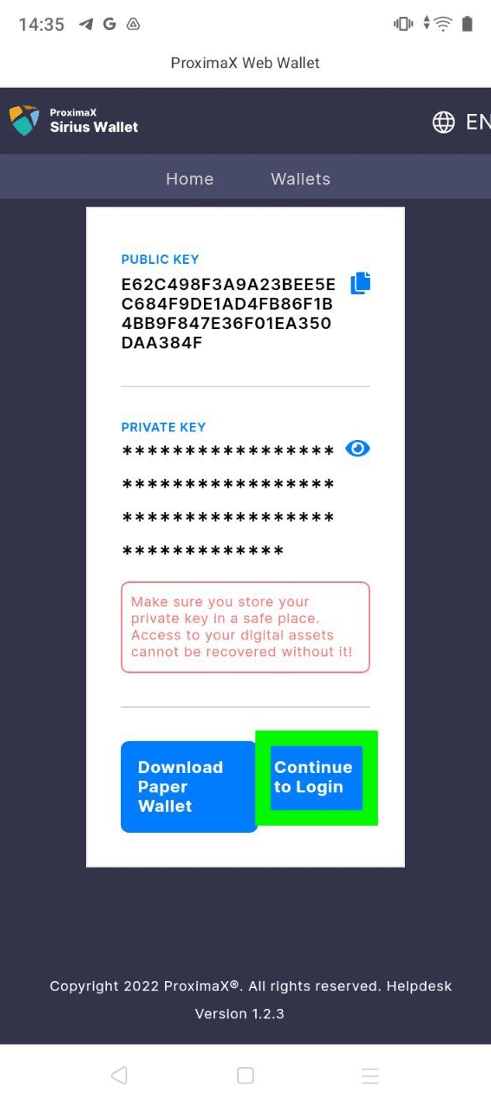
- Save your private key in a secure location if you have not already done so, which is the same private key found in your mobile wallet.
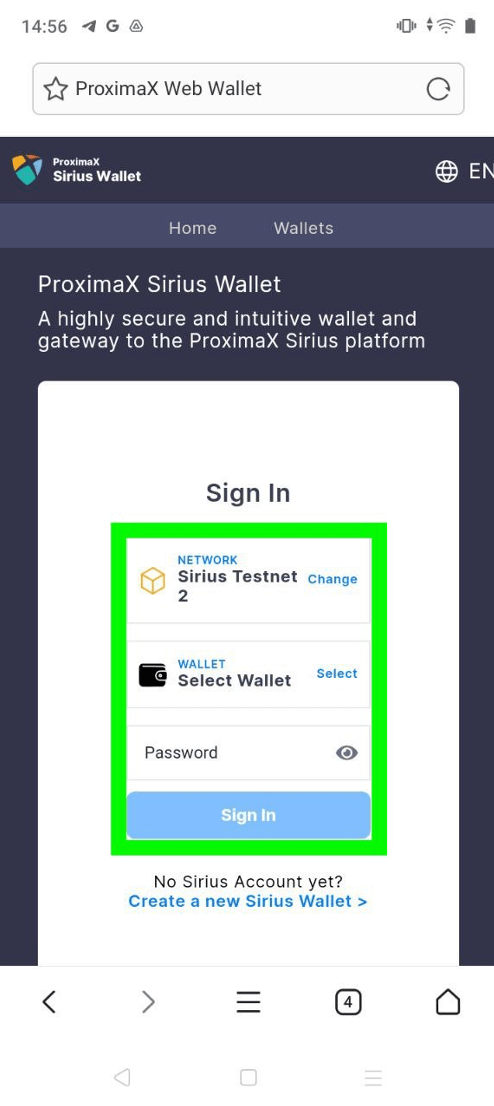
Step 5:
- Scroll down and select Continue to Login.
- In the Sign In page:
- Ensure Sirius Testnet 2 is selected.
- Select the wallet you have created.
- Enter your password.
- Select Sign In.
Step 6:
You will now arrive at the home screen and have access to the web wallet’s advanced functionalities.